Raw Treats

Date, Banana & Peanut Butter Chocolate Bites

Here’s a really quick and easy recipe for if you want something sweet in the freezer that requires no baking or blending! Only takes about 10 mins and they are super delicious. It’s super basic, which is why I like it. There are a few renditions you can make, like these Chocolate Dipped Date & Peanut Butter Bites (which omit the banana) but I like having the creaminess of the banana in there. I will say the better quality the dates the better! Medjool are best.

Date, Banana & Peanut Butter Chocolate Bites

Ingredients

1 Banana
Medjool Dates
Peanut Butter
Sugar Free Dark Chocolate

Method:

  1. Take your dates and flatten with the back of a spoon to make a base and lay out on some baking paper

  2. Once flattened, top with 1/4 tsp of your favourite nut butter (I use smooth peanut butter but crunchy is also good to add in more texture)

  3. Slice your banana and place 1 piece on top of the peanut butter. Squish it down a little so it sticks together

  4. Take your dark chocolate (I use sugar free) and melt in the microwave in 30 second bursts, then drizzle all over the top of your bites

  5. Place in an air tight container in the freezer and take one out whenever you need a sweet treat!

Raw Chocolate Tart

And we have a winner. When I think about yummy Christmas food, I think of chocolate. Am I right? I have always loved baking for my family at Christmas time and usually something with chocolate is in the mix. When coming up with my menu for this baking series, I knew there needed to be something in there for chocolate lovers everywhere.

rawchocolatetart3

This recipe is gluten free, dairy free, vegan & refined sugar free. Oh, and also surprisingly easy.
Remember to soak your cashews at least 4hrs in advance of making! The longer you soak them, the creamier the mixture will be.

Serve with fresh strawberries or raspberries.

Ingredients:

Base
2 cups natural cashews
1 cup almonds
1/2 cup pitted dates
3 TBS cacao
2 TBS pure maple

Chocolate Filling
2 cups (250g) raw cashews (soaked for minimum 4 hrs)
1 teaspoon vanilla paste
1 tablespoon lemon juice
½ cup coconut oil, melted
50g cacao butter, melted
1 teaspoon maca powder (optional)
1/3 cup pure maple syrup
100ml (about 7 tablespoons) nut milk of choice
¾ cup raw cacao powder

Method:

The cashews for the filling need to be soaked for a minimum of 4 hours (recommend longer).

To make the base, place all of the dry ingredients (nuts and cacao) into your blender and blitz until crumbly. Add your drained, soaked dates and maple and blitz again until the mixture is combined. Mixture will be sticky. Pop your base into a tart tin and press into the base and up the sides. Place in the fridge while you make the filling.

To make the filling, place all ingredients back in your blender and mix until smooth, this will take anywhere from 3-7 minutes depending on your blender. Pour the filling over your base and place in the freezer to set.

Serve with strawberries or raspberries along with some plain coconut yogurt.

Can be stored in an airtight container in the freezer for up to 3 months.

rawchocolatetart
rawchocolatetart2

PB & J Raw Slice

I love peanut butter and jam on bread. Give me some thick grainy bread - toast it and I’m done.
It’s one of my favourite things ever.

peanutbutterjellyslice

I love the combo of a good quality peanut butter with a delicious fruity jam or jelly, so when Pics Peanut Butter here in NZ sent me some of their new Boysenberry Jelly to try, I knew I wanted to create a ‘me’ version of a PB&J treat. After eating several teaspoons straight from the jar (oops), I decided to make a wholesome PB&J slice that I could enjoy, and take me back to my childhood of PB&J sammies!

I actually used the base of my Best Raw Caramel Slice recipe, added oats & peanut butter to the the mix to bulk it out a bit more, and then added a layer of the jelly mixed with chia seeds so that it would set. On top of that, of course, some Pics Smooth Peanut Butter.
Swirl it around so it gets all mixed together!

It’s goey, messy and utterly delicious.

For The Base

IMG_6765.JPG
  • 1 cup cashews

  • 2/3 cup almond meal

  • 2 cup wholegrain oats

  • 3 tbs. coconut oil

  • 3 tbs. smooth Pics Peanut butter

  • 3 tbs. cacao powder

  • 1 tbs. 100% maple or rice malt syrup

Jelly Layer

  • 6 tbs. Pics Boysenberry Jelly

  • 2 tbs chia seeds

Peanut Butter Layer

  • As much peanut butter as you like!

Method:

Blend together all of the dry base ingredients until it becomes a fine crumb. Add in your wet ingredients and blend again. Mix will be quite wet. Place into the bottom of a 20inch pan and set in the freezer.

In a small bowl, combine the jelly and chia seeds. Take out your slice and smooth over the jelly layer. Return to set for an hour or two.

Once set enough, add some smooth peanut butter and swirl it around to get the PB&J blended.
Cut into squares and enjoy!

xx

Raw Peanut Butter & Chocolate Cheesecake

peanutbutterrawcheesecake.jpg

I've been wanting to attempt a raw / vegan cheesecake for ages. Whenever I have them out somewhere I always think they taste incredible, but for some reason they intimidated me.
Lets break it down though. Really, all we have here is a base (all in the blender), filling and a simple ganache on top, not dissimilar to all the other slices I make.  

With friends coming over tonight it was the perfect excuse. The hardest part was actually deciding on flavour - next time I will go for blueberry, but for my first try I decided on Peanut Butter using my fave PB from Pics. I spotted this recipe on Julia & Libby's website a while back, all I did was make a few adjustments with the topping, opting for a chocolate ganache layer on top.   I also made some peanut butter and cacao bliss balls to go on top, which I will post the recipe for tomorrow. 

It gets all the ticks from me - it's refined sugar free, choc full of protein with all of those nuts, it's vegan (completely dairy free) and gluten free. 

So lets do this!  Honestly, it was easy and it's SO SO decadent and delicious, perfect for a special occasion or slicing and popping in the freezer to eat piece by piece!

Peanut Butter & Chocolate Cheesecake

Crust

  • 1.5 cup almonds

  • ½ cup raw peanuts

  • 8 medjool dates, pitted and soaked for half an hour in warm water.

  • 1 tablespoon coconut oil, melted

  • 1 tablespoon cacao powder

  • Pinch of salt

Filling

  • 2 cups of cashews, soaked overnight

  • 400 grams coconut cream

  • ½ cup maple syrup

  • ½ cup peanut butter, melted

  • 1/2 cup cacao butter, melted

  • Juice of 1 lemon

  • 1 teaspoon vanilla bean paste

  • Pinch of salt

Chocolate Ganache

  • 3/4 cup coconut milk

  • 1 block dark Ghana whittakers chocolate chopped into chunks

Instructions

  1. Line spring form tin with baking paper. Place all crust ingredients into food processor and pulse until grainy-mixed texture. Press crust down into cake pan evenly and place into the freezer.

  2. Place all cheesecake ingredients into food processor and blend until smooth and creamy. Spread evenly on top of base using a knife or spatula. Place in the freezer for 3 or more hours.

  3. Once the cake is set, make your ganache. Place your coconut milk in a pot and heat on low until it starts to steam - don't let boil.  Once hot, take off the heat and mix in your chocolate which will melt slowly. Fold until the ganache goes glossy

  4. Pour your ganache over top of the frozen cheesecake. I used a squezzy bottle but you can do this however you like. 

  5. Cake is best stored in the freezer.


peanutbuttercheesecake.jpg


Chocolate Dipped Date & Peanut Butter Bites

This honestly could not be easier and it feels so decadent. I like to make up around 10 and pop them in the fridge for an after dinner treat with my peppermint tea. 

Chocolate Dipped Date & Peanut Butter Bites

Photo 5-08-18, 11 07 25 AM.jpg

10 large medjool dates
Some Pics Peanut Butter
2 rows Whittakers dark ghana chocolate

Split your dates in half if they aren't already, and with a knife, fill it with peanut butter.
Put aside.

Meanwhile, in a pot, melt down your Whittakers dark chocolate. You can melt in the pot or use a double boiler, if using just the pot be very careful not to burn the chocolate. 

Once melted, take one date at a time and dip one side or as much as you can get in there without burning your hands!

Pop in a container and into the fridge to set. 

Raw Banoffee Bites

This recipe is up there with my absolute faves, like my Raw Salted Caramel Slice (see blog below this one), it is sticky, sweet and even good for you.  This recipe comes from one of my fave little NZ businesses, The Wholesome Co. They specialise in wholesome baking subscription mixes plus wellness tubs. I am a fan. Being that I have a sweet tooth, having some wholesome treats on hand is such a plus for me.  This recipe is from her Wholesome Treats V2 ebook and she has kindly let me share with you all.   I recommend making a batch and popping them in the freezer for when the sweet urge hits!

Raw Banoffee Bites

Base

½ cup almonds
¼ cup buckwheat groats or you can use an extra ¼ cup almonds
½ cup coconut
2 tbsp coconut oil
½ cup dates

Caramel

1 ripe banana
½ cup dates
¼ cup coconut butter or you can use regular butter
¼ cup maple syrup or rice syrup
1 tsp vanilla
¼ cup coconut cream

Topping

100g dark chocolate
1 tbsp coconut oil 

Method

Soak both lots of dates in two separate bowls of warm water for around 10-15 minutes and drain. 

Place the almonds, buckwheat, coconut, drained dates, and coconut oil into a food processor and blitz until combined.

Spoon the mixture evenly into 6 silicone moulds or muffin tin. Or you can make as a slice.

Place the base mixture in the freezer while you prepare the banana layer.

Place the banana, coconut cream, drained dates, vanilla maple syrup or rice syrup tbsp of the coconut butter into the food processor. Blitz until smooth. 

Pour evenly over the top of the base layer. 

Add the coconut oil chocolate into a small pot and melt gently.

Spoon evenly over the bites and return to the freezer. 

The Best Raw Chocolate & Salted Caramel Slice!

I have been experimenting with buying raw treats over the past 7 months and discovering a whole new world of amazing refined sugar free treats.  I've made some as well as I love to have a little stash in the freezer!  I must confess that pretty much all of the slices I have tried have been really really good - both made and bought, much better than I expected.  If you've ever doubted that raw can be as good as 'the real thing', then you absolutely need to try and see for yourself!

Of all my experimenting, the one that always gets me, no matter where I buy it from, is a caramel & chocolate slice or peanut butter and chocolate protein slice. Holy moly, caramel made from dates and coconut cream is out of this world good.

After dabbling with a few basic raw recipes I decided it was time to try the cream of the crop - a trip layer caramel slice.   It's delicious, utterly drool worthy and not as hard as I expected. Want to give it a go?  Here's the recipe, adapted from The Merrymaker Sisters. I'm gutted I didn't get any photos side on, and to be honest mine was a bit slapstick as I was in a rush - but in an ideal world, you should be three definite layers.

PS - Remember this is a treat and not something you should go crazy on.  Although refined sugar free, these types of slices are still high in natural sugars, so something you should eat in moderation.  Good luck with that!  Pop it in the freezer so that you don't get tempted to eat all at once.

Salted Caramel Choc Slice


For The Base

  • 1/2 cup cashews

  • 1/3 cup almond meal

  • 3 tbs. coconut oil

  • 2 tbs. cacao powder

  • 1 tbs. 100% maple or rice malt syrup

For The Caramel Filling

  • 1 1/2 cups dates

  • 1/2 cup coconut milk

  • 1/2 cup coconut oil

  • 1/2 tsp. Himalayan pink salt

For The Choc Topping

  • 1/2 cup coconut oil

  • 2 tbs. cacao powder

  • 1 tbs. 100% maple or rice malt syrup

  • 1/2 tsp. pink Himalayan salt (optional)

Method

  • Line a 20 x 10 cm (8 x 4 inch) loaf tin with baking paper.

For The Base

  • Place all the base ingredients in to a food processor (we use our Vitamix). Whiz until well combined, it will be a little sticky and crumbly.

  • Press this mix in to the prepared tin, ensure it is pressed evenly.

  • Place the tin in to the freezer to set

For The Caramel Filling

  • Using the food processor (don't worry about washing it) place all the caramel filling ingredients and whiz until completely smooth (it will take around 5 minutes).

  • Pour this delicious mixture over the top of the base and return to the freezer.

For The Choc Topping

  • Using the food processor (again, don't worry about washing it) add the raw cacao, coconut oil and maple syrup, mix until completely smooth.

  • Pour the choc topping over the caramel filling, shake the tin slightly to even it out. I gave it a bit of a swirl!

  • Sprinkle with Himalayan pink salt if you like things extra salty.

  • Return to the freezer for about 1 hour or until completely set.

  • Once set, cut into slices and store back in the freezer!

rawchoccaramelslice

Raw Vegan Lemon & Coconut Slice 

Those of you who follow me on instagram, when it comes to food, know three things for certain  - I love smoothies, I have a sweet tooth and I love Cathedral Cove Naturals products. 

It started with the paleo cereals to put on my smoothies or bowls for some crunch, and then I discovered the coconut yogurts. I love yogurt, and when I started focusing on my health and the amount of refined sugar I was having, I really struggled to find a dairy yogurt that was good for me.  The lowest I could find was 6g of sugar per 100g, which is actually not too bad really and I made do with that for a while.    

Then I found  Cathedral Cove natural yogurt, how could this creamy goodness taste so good and be so low in sugar? There is only 1g of sugar per 100g and it literally has two ingredients - coconut cream and probiotic cultures. That's it.  

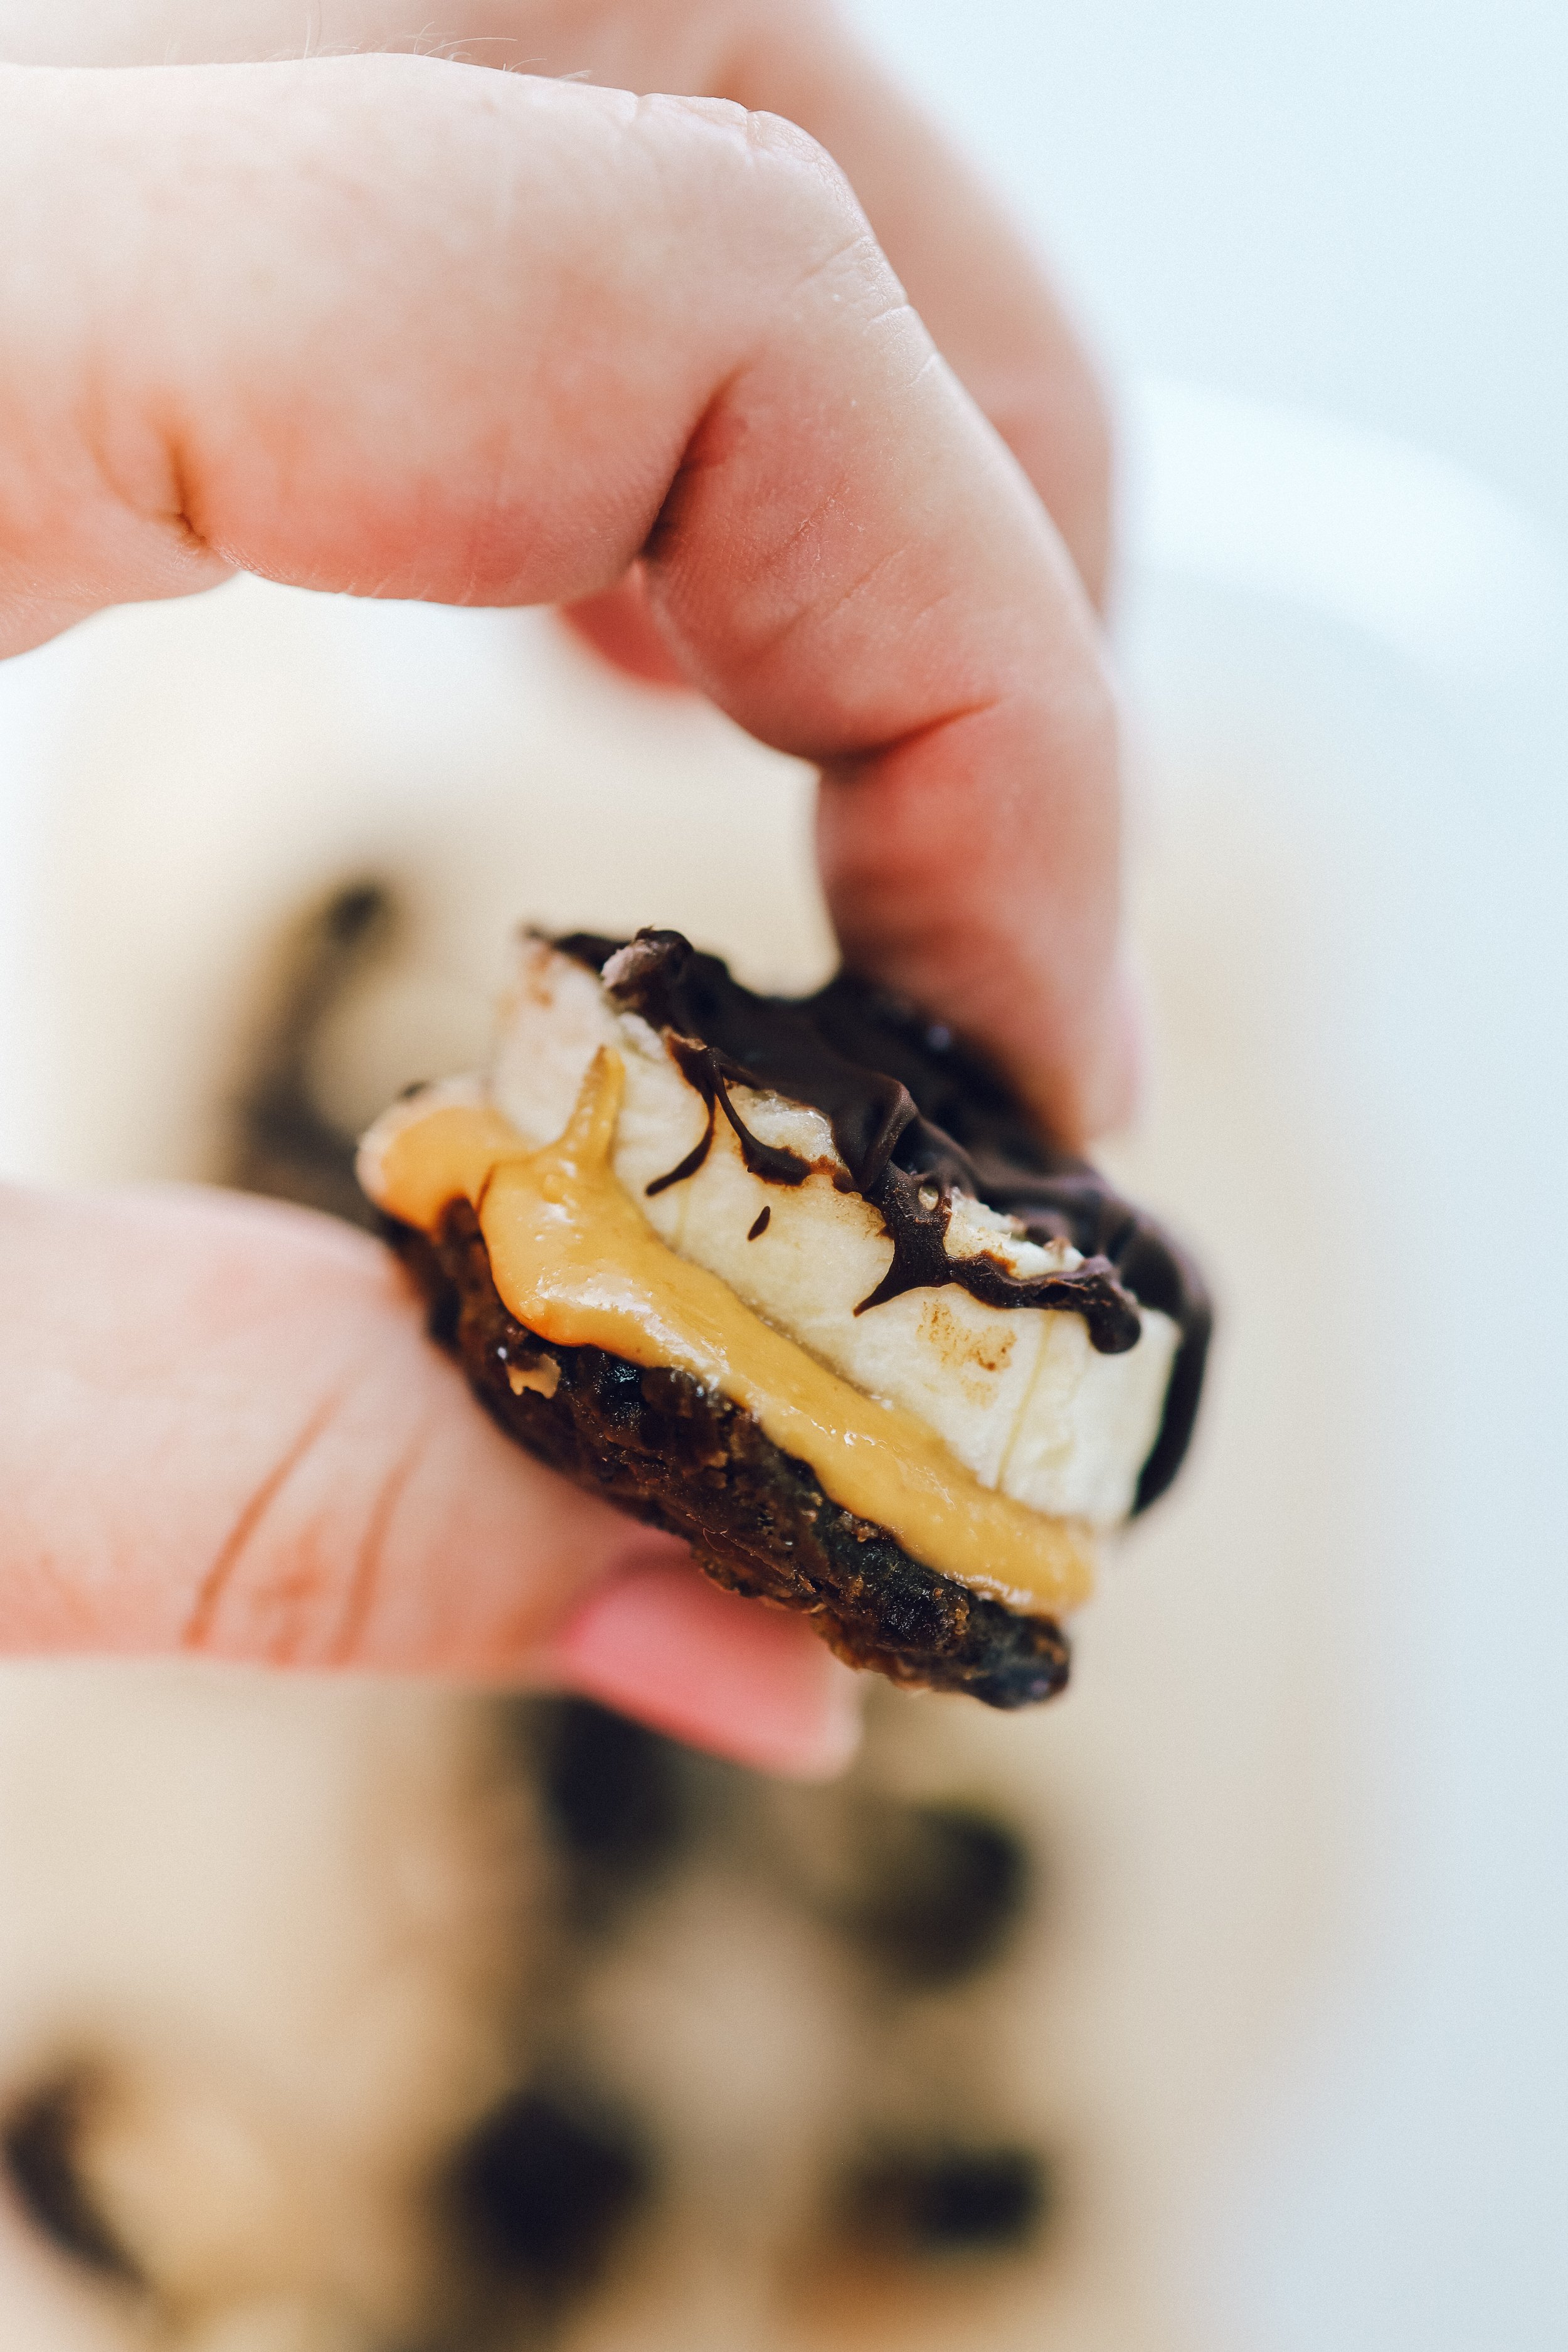
I use it primarily as a topping or base - combine the yogurt with their cereal and some fruit and you've got heaven in a bowl (see my instagramfor photos!) They also have several other flavours if you're wanting something more decadent, the raspberry and chia one is my absolute fave (this one is slightly higher in sugar). 

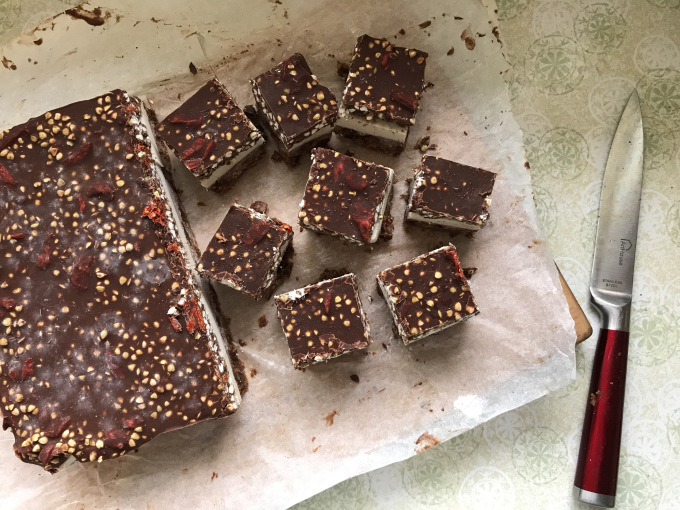
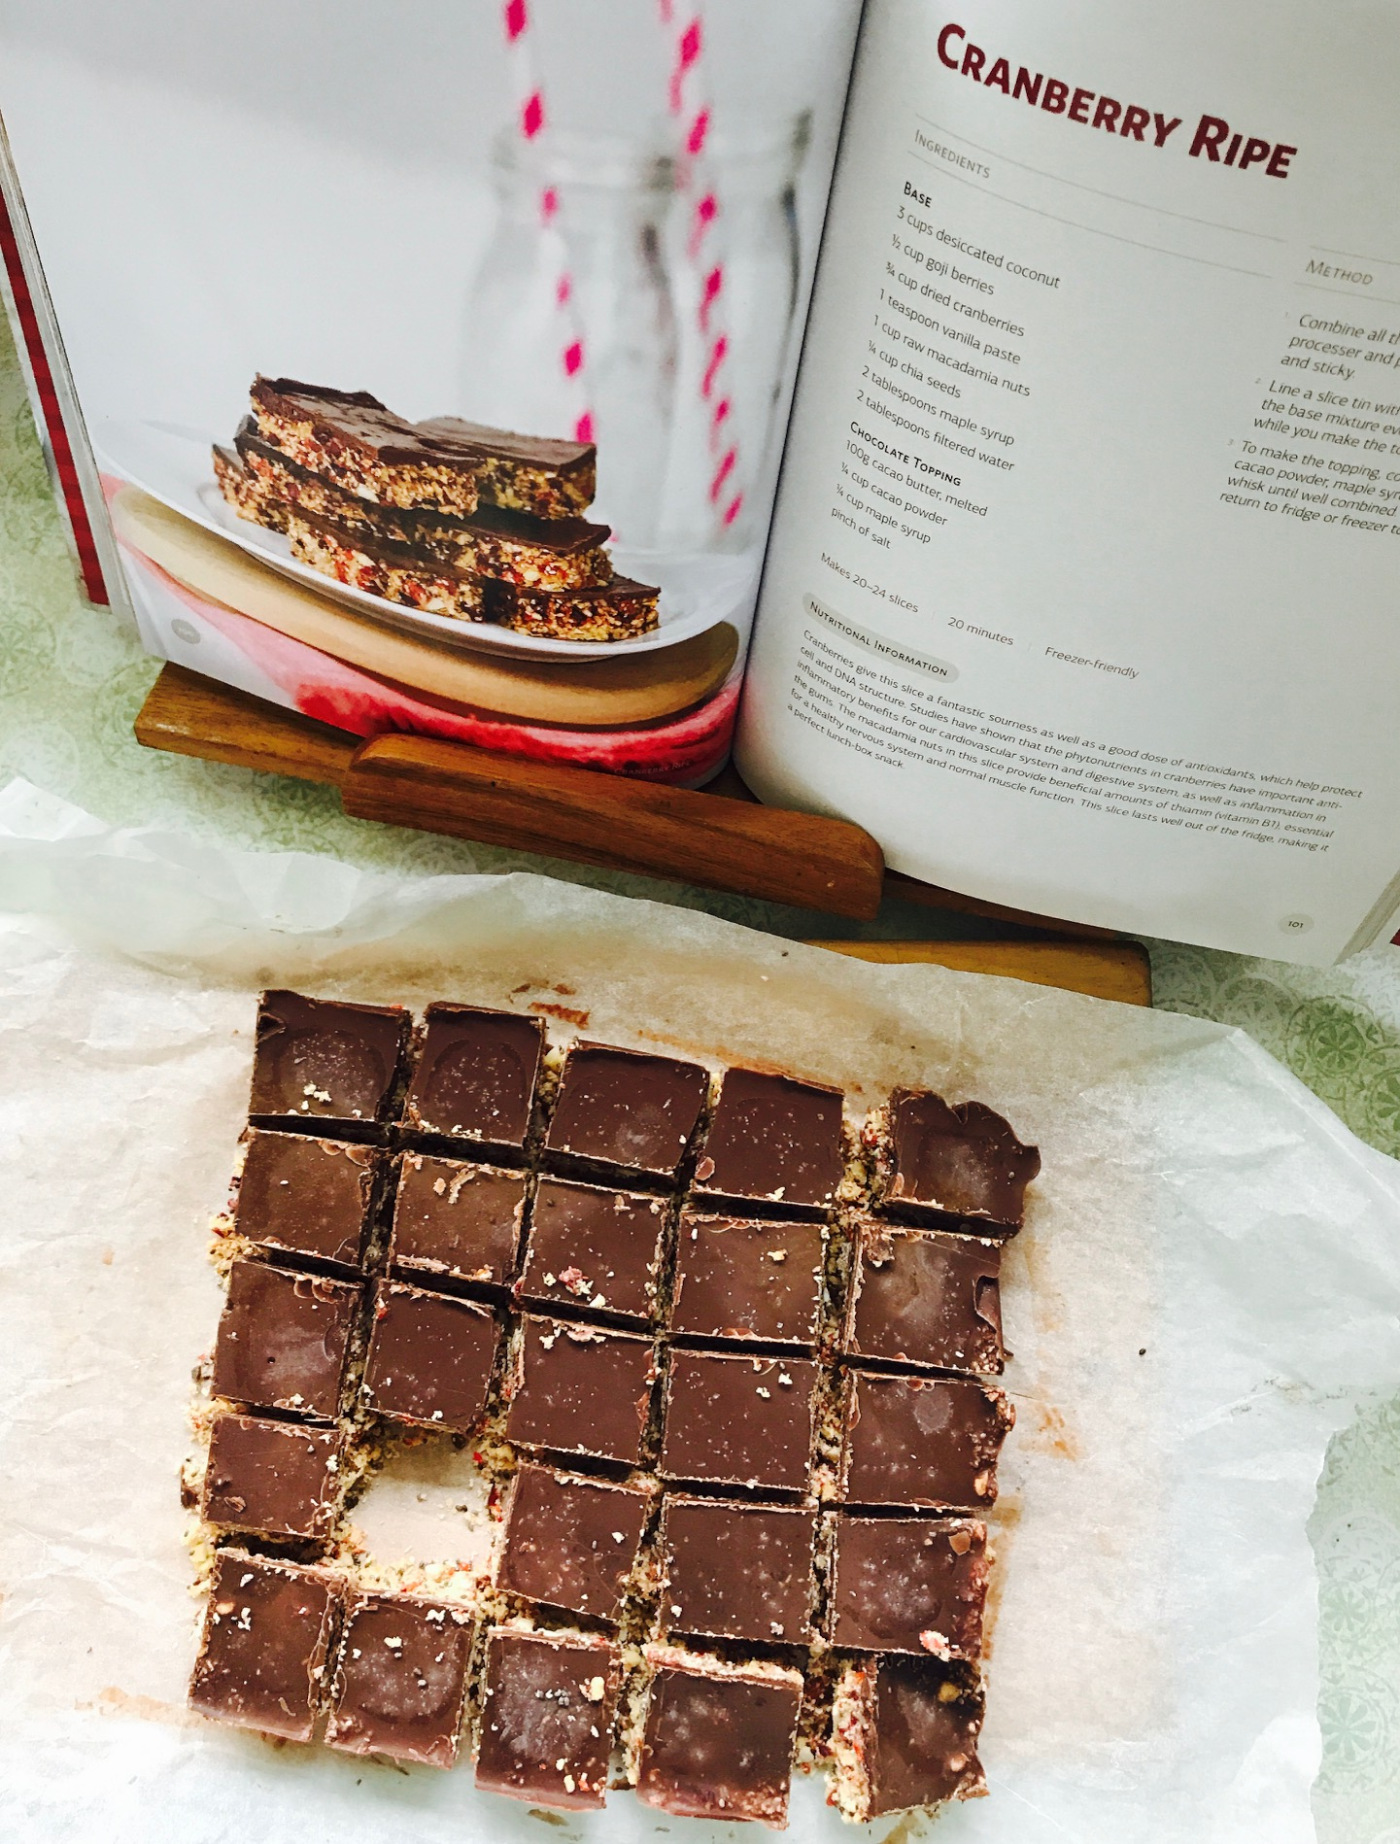
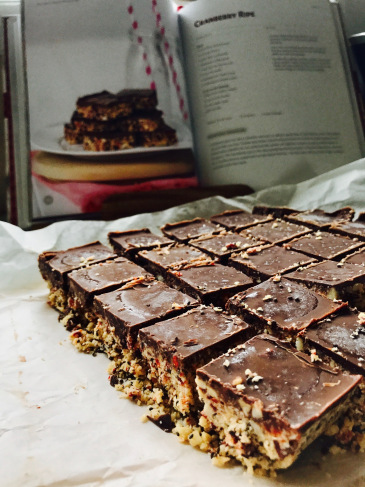
After following them on instagram I've seen there are a lot of clever ways to use coconut yogurt, including raw baking. One slice caught my eye so I decided to make it yesterday. This recipe comes from their website and is really really delicious and super simple!  

Make it and let me know what you think! 

Ingredients

Base

1 Cup of Desiccated Coconut

1 Cup of Mixed Nuts (we used cashews and macadamias)

2 Tbs of our Raw Organic Coconut Oil

2 Tbs of Coconut Butter (or nut butter of choice)

1 Tsp Cinnamon

½ Tsp Ground Ginger

Filling
1 Cup Natural Coconut Yoghurt

1 Cup of Raw Cashews (soaked overnight)

Zest and juice of one large Lemon

3 Tbs of Pure Maple Syrup (or sweetener of choice)

½ tsp of Vanilla Powder

Garnish (optional)
Handful of chopped Mint, Zest of one Lemon, Chopped Macadamias

Freeze dried Strawberries

Instructions
Firstly, line a square baking tray or container with baking paper. 

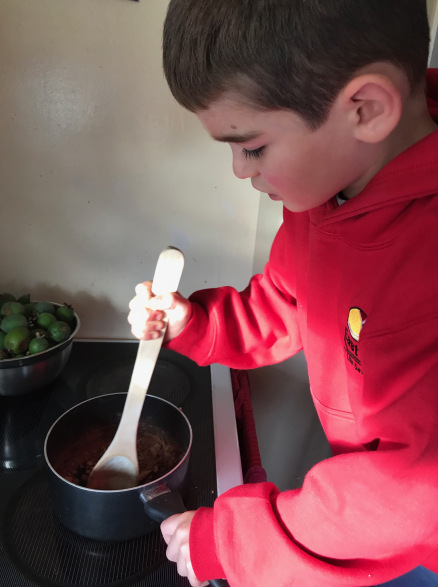
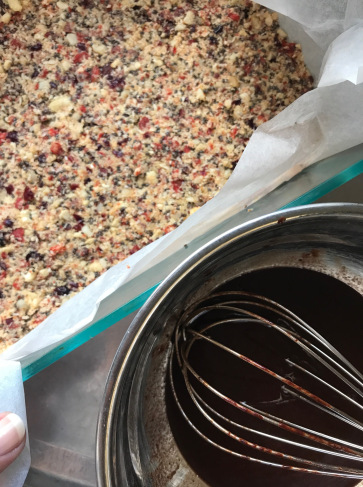
To make the base add all of the ingredients into a food processor and blend until everything is combined. The mixture should be able to come together easily. Place the base mixture into the baking tray and press down firmly. Transfer to the freezer while you make the filling. To make the filling add all of the ingredients into a high-speed blender and blend until the mixture is smooth. Pour the filling on top of the base layer and put back into the freezer to allow it to set over night or for 4-6 hours. Once this layer has set you can garnish it with the mint, lemon zest, macadamias and freeze dried strawberries. Prior to serving place the slice in the fridge for a couple of hours to allow it to soften.

rawlemoncoconutslice

Raw Chocolate Peppermint Crunch

Recipe from Dr Libby's Sweet Food Story

I'm all about that sweet life. Even with balancing out my diet (and no doubt my hormones) I like to have something a little sweet now and then.

This is slightly more effort than the Cranberry Ripe recipe I posted a week or two ago (see recipe HERE) but it is definitely more decadent too. It's best kept in the freezer in small portions, just pull out a piece when you need a pick me up or want a treat. If you let it defrost ever so slightly the middle layer goes all gooey and melts in your mouth.  YUMMO!

Sweet things never used to be safe in the house with me around, and I'm loving that I'm not having the same cravings I did before.

If you're not confident with raw baking, below are some step by step photos to help you along. Well worth the effort.   Note: I got almost all of the ingredients from Binn Inn

Chocolate Peppermint Crunch

Ingredients

Base
1 cup raw almonds, soaked overnight then rinsed well
1 cup desiccated coconut
1/4 cup filtered water
1 cup dried dried dates
1/4 teaspoon cinnamon
1/3 cup cacao powder
pinch of salt

1.combine all of the base ingredients in a food processor and pulse until well combined and sticky.
2.Line a slice tin with greaseproof paper, press the base mixture into it evenly and place in freezer to set.

White Peppermint Filling
1 cup raw cashew nuts, soaked overnight and rinsed well
1/2 cup coconut cream
2 tablespoons honey
1 tablespoon lemon juice
6-8 drops peppermint essence
pinch of salt

3.To make the peppermint filling, combine all ingredients in a high speed blender and blend until creamy and smooth. Pour mixture over base and return to freezer to set until very firm.

Chocolate Topping
100g cacao butter, melted
1/4 cup cacao powder
1/4 cup maple syrup
1/3 cup goji berries
1 cup dehydrated buckwheat groats (Binn Inn have these)

4.To make the chocolate topping, combine the cacao butter, cacao powder, maple syrup and salt in a bowl and whisk until well combined. Add the goji berries and buckwheat and mix well. Pour chocolate over the set filling and base. Place in freezer until completely set.

rawchocperppermintslice

Recipe - Cranberry Ripe

I have been discovering some amazing recipes and new tricks in the kitchen lately.  If you know me already, you know I love to bake, I even owned a baking business for a few years.  I think my love of baking originally came for my love of sweet things, and wanting to recreate sweet treats that I had seen or had at a cafe.   Nothing has changed really!

At the Total Health Explosion event in New Plymouth last weekend I tried some raw treats from Raw Balance.  They were GOOD. Seriously good. I couldn't believe they were so delicious!  So I came home thinking 'I need to learn to do that'.  I had totally forgotten that I had purchased a Dr Libby recipe book a few years ago (with good intentions) but never actually made anything from it.  I think that 'raw food' has always intimidated me a bit, I'm more familiar with traditional baking - flour, sugar, butter - you could say it's my comfort zone.

Well, I am happy to report my first attempt was a success (bulging eyes from Aiden and two thumbs up) and I couldn't believe how easy it was. Only 3 steps, and Aiden helped.
I think some recipes can be more labour intensive than others, but if you're like me and want to give something a try, this recipe is the perfect first step.

There are a few staple ingredients you will need that you may not have at home - don't let that intimidate you!  I went to my local Bin Inn and bought some things I'd seen recurring on several recipes, and now they are in my pantry ready for my next experiment.

Give this a go and ENJOY!  I've included a few photos to help you.

This recipe is best kept in the freezer in small portions to pull out when you need a sweet treat.

CRANBERRY RIPE

For the base:

  • 3 cups desiccated coconut

  • 1/2 cup goji berries

  • 3/4 cup dried cranberries

  • 1 tsp vanilla paste

  • 1 cup raw macadamia nuts

  • 1/4 cup chia seeds

  • 2 tbsp maple syrup

  • 2 tbsp filtered water

For the Topping:

  • 100g cacao butter, melted

  • 1/4 cup cacao powder

  • 1/4 cup maple syrup

  • pinch of salt

  1. Combine all the base ingredients in a food processer and process until well combined and sticky.

  2. Line a slice tin with greaseproof paper and press the base mixture evenly into the tin. Refrigerate while you make the topping.

  3. To make the topping, combine melted cacao butter, cacao powder, maple syrup and salt in a bowl and whisk until well combined. Pour over the base and return to fridge or freezer to set completely.